
Why Tubeless Matters for E-Bike Riders in 2025
E-bikes come standard with inner tubes inside the tires, but converting to tubeless can be one of the best upgrades to keep you riding happy and prevent flats on the trail. As e-bike technology evolves in 2025, riders are increasingly seeking ways to optimize performance, extend battery life, and improve the overall riding experience. Converting your e-bike to tubeless tires represents one of the most impactful upgrades you can make.
The benefits of converting your e-bike tires to tubeless are substantial – so much so that professional riders consistently choose tubeless setups for their own bikes. The first and most noticeable advantage is shedding weight from your wheels, with that reduction in rotational mass making a significant improvement to handling.
Key Benefits of Tubeless E-Bike Tires
1. Superior Puncture Protection
With tubeless tires, you'll experience fewer flats. When a tire deforms after hitting a hard object like a rock, traditional tubed tires risk pinch flats, where the rock and rim squeeze together forcefully enough to tear the tube. Switch to tubeless, and you'll never have to fix a pinch flat again.
The sealant inside tubeless tires automatically repairs most small punctures as you ride. Many tubeless riders discover their tires riddled with sealed thorn pricks after a ride, showing how effectively the system prevented potential flats.
2. Enhanced Ride Quality and Control
For e-bike riders, the ability to run lower tire pressures without risking pinch flats translates to:
More traction, resulting in greater confidence and control. A larger tire footprint that adapts better to the terrain. A smoother ride as the tire molds around obstacles rather than bouncing off them.
A study published in the Journal of Sports Engineering and Technology revealed that tubeless tires have 10% lower rolling resistance compared to tubed tires, potentially increasing efficiency on varied terrain. When running at lower pressures, tubeless tires can reduce vibration and improve comfort by 15%, which is significant for longer rides.
3. Weight Reduction = Extended Battery Life
By replacing tubes with sealant, you can reduce weight by approximately 0.5 to 0.75 pounds PER WHEEL! While overall bike weight isn't as crucial when you have a motor, the rotating weight on wheels affects both ride feel and battery life.
For e-bike riders, this weight reduction in a rotating component means less energy expenditure as you ride, potentially extending your battery range on longer adventures.
Tubeless Conversion Step-by-Step Guide
Converting your e-bike to tubeless requires some specialized tools and components, but with our guide, you'll be rolling tubeless in no time.
What You'll Need
- Tubeless-compatible rims (check your e-bike's specifications)
- Tubeless-ready tires (look for "TLR," "TR," or "Tubeless Ready" on the sidewall)
- Tubeless valve stems
- Tubeless rim tape (correct width for your rims)
- Tubeless sealant
- Valve core remover
- Floor pump with pressure gauge (air compressor is helpful but not essential)
- Soapy water in spray bottle
- Tire levers (use sparingly)
Step 1: Prepare Your Rims
- Remove your existing tires and tubes
- Clean the rim thoroughly to remove old tape, debris, and residue
- Apply tubeless rim tape, starting opposite the valve hole
- Wrap the tape around the rim at least twice, keeping tension consistent
- Cut the tape cleanly and press firmly to ensure proper adhesion
- Make a small hole for the valve stem using a sharp tool
Step 2: Install Tubeless Valves
- Insert the tubeless valve through the rim from the outside
- Secure with the included nut from the inside (don't overtighten)
- Make sure the valve moves freely and the rubber base seals against the rim
Step 3: Mount the Tire
- Mount one side of the tire onto the rim
- Position the tire bead in the center channel of the rim
- Go easy on the tire levers – especially metal ones – as they can kink the bead and create air leaks. If needed, use them gently and sparingly.
- For stubborn tires, use soapy water on the bead to help it slide into place
Step 4: Add Sealant
- Remove the valve core using a valve core remover
- Add appropriate amount of sealant (usually 2-4oz for e-bike tires)
- Reinstall the valve core and tighten
Step 5: Inflate and Seat the Tire
- An air compressor is extremely helpful for seating tubeless tires, as it solves the problem of inflating rapidly enough to quickly seat the bead onto the rim. A CO2 cartridge can also work but becomes expensive with multiple inflation attempts.
- Inflate to maximum recommended pressure to seat the beads
- Listen for popping sounds as the beads snap into place
- Once seated, reduce to your desired riding pressure
- Shake and rotate the wheel to distribute sealant
Step 6: Test and Troubleshoot
- Check for air leaks by applying soapy water around the beads and valve
- Bubbles indicate leaks that may require additional sealant or adjustments
- Take a short test ride to ensure the sealant is distributed properly
Maintaining Your Tubeless E-Bike Tires
Regular Sealant Checks
Tubeless sealant eventually dries out, typically requiring replenishment every 3-6 months depending on your climate. To check sealant levels:
- Remove the valve core
- Stick a small zip tie or similar tool through the valve to feel for liquid sealant
- If dry, add more sealant through the valve (after removing the core)
Dealing with Larger Punctures
While tubeless sealant handles small punctures automatically, larger cuts may require additional intervention:
- For medium punctures, tubeless tire plugs can quickly seal the hole
- For significant damage, you can always install a tube as a temporary solution
- Carry a small tubeless repair kit on longer e-bike adventures
Is Tubeless Right for Your E-Bike?
Tubeless tires may be an ideal choice if your e-bike rides involve traveling over rough or uneven terrain, as they provide comfort and safety in various weather conditions while decreasing punctures.
However, consider these factors before converting:
- Initial Investment: The average cost of converting to a tubeless setup (including tires, sealant, and potentially new rims) is approximately $200-$300, compared to regular tubed tire setups at around $100-$150 for similar quality.
- Maintenance Requirements: Tubeless systems require periodic sealant checks and replenishment
- Technical Comfort: You'll need basic mechanical skills for setup and maintenance
Why E-Bike Riders Are Making the Switch in 2025
The e-bike revolution continues to accelerate, with the global market projected to reach $119.72 billion by 2030. As technology improves, e-bikes are becoming increasingly specialized for specific needs like commuting, carrying cargo, and off-road adventures.
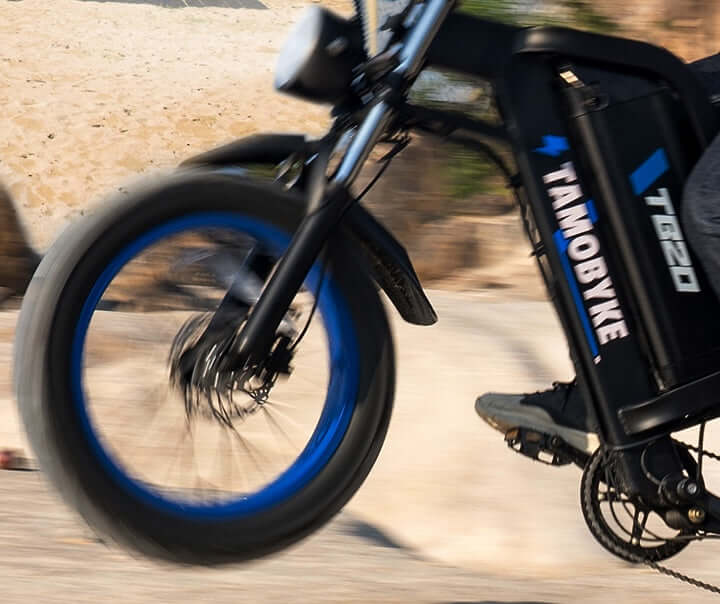
In 2025, fat tire e-bikes are particularly popular among riders wanting versatility across different terrain types. These bikes excel both on city streets and rougher trails, making tubeless conversion even more valuable for preventing punctures and improving ride quality.
For serious e-bike enthusiasts, tubeless conversion represents a significant improvement in reliability, performance, and ride quality. The initial investment in time and components delivers lasting benefits that enhance every ride.
Conclusion: Elevate Your E-Bike Experience
Converting your e-bike to tubeless isn't just about preventing flats—it's about transforming your entire riding experience. With improved traction, reduced weight, greater comfort, and enhanced reliability, tubeless tires allow you to push your e-bike's capabilities further while worrying less about maintenance on the trail.
As e-bike technology continues to evolve in 2025, tubeless conversion stands out as one of the most cost-effective upgrades for serious riders looking to optimize performance and enjoyment.

Share:
How to Changing Fat Tires on Your Tamobyke
Protection for All-Weather Riding-Waterproofing performance